Chasing The Ancient Windows Movie Maker Hue Shift
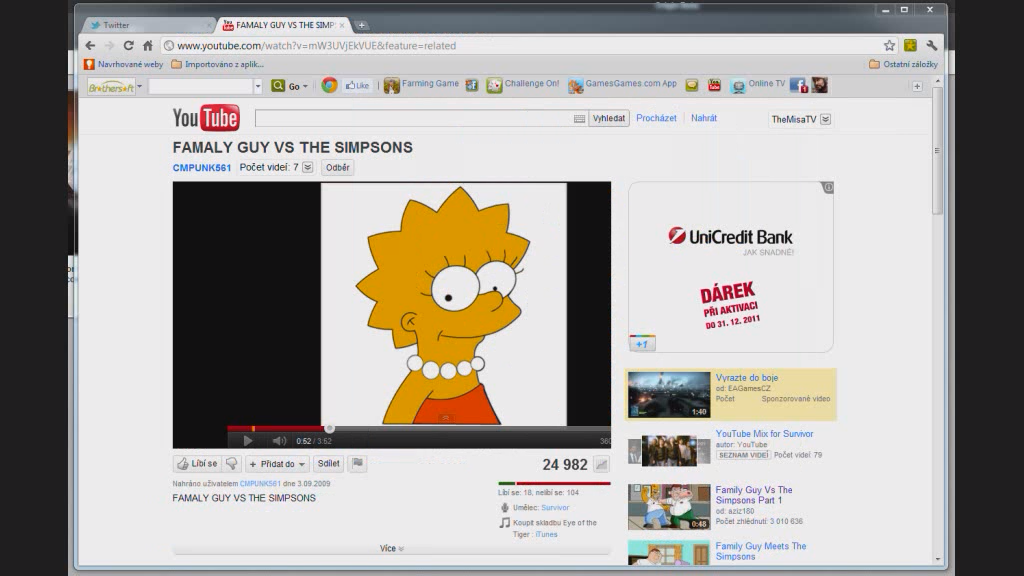
If you’ve ever been on old YouTube, you’ve probably noticed that people didn’t exactly take care of their videos back in the day. Washed out colors, wrong aspect ratios, extreme compression with enormous watermarks – all of that was a very common sight. But there is one artifact of the past, that has always piqued my interest. That is: The Windows Movie Maker Hue Shift.
(Copyright: 20th Century Fox, used for reporting purposes only)
Now, for me personally, this mystery has always been something I’ve been interested in to some level. I have tons of old videos from the late 2000s and early 2010s edited in Windows Movie Maker and some of them are from the affected versions and make the effect very visible. It’s also one of the many things that make up ancient YouTube nostalgia for me. This made me interested in being able to recreate the effect with modern-day software without falling back on ancient installations.
The Impulse
Now, even though I’ve outlined my motivation for why this would have always been in the back of my head, the final impulse to start looking into this came from somewhere else entirely: I’ve accidentally recreated the effect in an authentic way!
This is very tangentially related but I decided to make a 2009-esque Movie Maker style video for one of my YouTube channels as an April Fools joke. And, since I like authenticity, I decided to edit it using an era-accurate version of the actual software extracted from Windows Vista. So I made my video, I hit publish and… I was greeted with a very familiar phenomenon!

And unlike most people who would have noticed this, I was actually happy about this, since it made the final result even closer to the videos I was trying to imitate. But it also gave me a chance to finally look into this issue.
The Bruteforce Fix
The simplest way I could think of to create a reversal mechanism was to generate a bunch of images containing every single possible color, put them all into a Movie Maker video, render them out and create a map mapping every single broken color to a fixed variant.

and the Movie Maker result (visually darker).
So that’s exactly what I did. I generated a set of 1080p images, (yes, Windows Vista’s Movie Maker already supports 1920×1080 out of the box – it came out right as Blu-Ray and HD DVD were starting to spread) each containing a set of 8×8 pixel large squares with each color (size chosen in an attempt to avoid macroblocking artifacts). Then I exported a video containing all of these (each for 1s) and used a Python script to create the mapping (using a median of all frames containing a single image and the value of the middle pixel in the square).
Then I tried applying the results using another script. It almost worked!

the parts that are visible do appear to be visually correct.
Well, that’s definitely not what the original looked like. This was a good initial sign that I was on really good track though. Sure, most of the resulting image was black but the portions that were visible looked like they were supposed to! So why was most of the image gone?
Fixing the Swiss Cheese Holes
Video compression is very highly based on throwing away all detail the human eye is unlikely to notice. One of the primary ways of achieving this is by reducing the amount of color used. This was very prevalent in the test video – my 16 million color dataset got reduced to a mere 2.7 million. That’s effectively a downgrade from 8-bit color to 7-bit!
However, the reduced colorspace wasn’t consistent between videos, which meant that I had to interpolate the dataset somehow and fill in the gaps. Now, maybe I could have covered the full 8-bit range with a different approach, perhaps by rendering each color as a fullscreen image separately, but approaches like this would lead to their own issues down the line.
So I decided to go for Nearest Neighbor interpolation in the meantime – if a color isn’t found in the dataset, it simply finds the one it considers the closest and interpolates based on that. And this finally got me very good results. But only for some videos.
Investigating The Root Cause
We’ve been talking in RGB for the duration of this blog post. This is all fine for making comparisons and human understanding but it is not how computers actually store video.
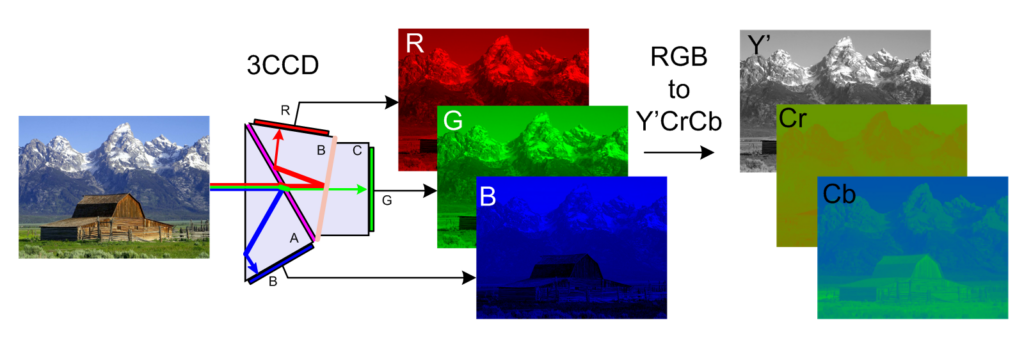
Most codecs, including WMV9, store color in a format called YCbCr or YUV. Instead of storing the separate Red, Green and Blue values, this format stores the luma (Y – how light the image is) and 2 color components – the red difference and the blue difference. A lot of source content – especially PNG images and screen recordings – is stored in RGB though, which means that it has to be converted during export.
I’ve also been talking about this error solely in the context of Windows Movie Maker, however this isn’t the only case where I’ve encountered this exact issue. As a member of the Restoration Union, a Geometry Dash group focused on archiving the history of this game and its levels, I’ve done a lot of analysis on Android screen recordings, often trying to pick out color details with hex-code level precision. Many of these recordings were affected by the same issue though, despite never going through Movie Maker to begin with. Yet, the recovery script I wrote worked perfectly for most of them.

This proves that this was not just a Microsoft problem, but rather a sign of some more common issue. Another important detail is, that this bug didn’t affect all versions of Movie Maker. In fact, it was only introduced in the update made for Windows Vista (and only when exporting to .wmv). The Windows XP version and the Windows Live rewrite that went out alongside Windows 7? They don’t have it. And what else was introduced in Windows Vista? Native support for HD video.
And this is more important than it might seem because remember how I mentioned the conversion between YUV and RGB? The standard that traditionally defined that equation is called BT.601. However, when HD video came around, so did a new standard for this conversion called BT.709.
This is the part that I believe is implemented incorrectly in several old encoders, including the one used by Movie Maker. And, indeed, when we import a file that’s already in BT.709 (or YUV in general) and render it out, it looks completely normal.
Reversing The Math
Knowing that the output is relatively deterministic and that this is all caused by a mistake made somewhere in the conversion math I figured the next best move would be to find a mathematical relationship. And, indeed, there is one. A fairly simple linear equation too.
(disc stands for discolored). Or, if we want the reversal formula:
Alternatively if we want to recreate it based on the map instead of calculating it from the first equation:
The result for the reversal formula slightly differs depending on whether I attempt to reverse the formula mathematically or whether I recreate it based on the map. I decided to post both options to demonstrate the inaccuracy margin.
The exact offsets at the end of the formula are most likely just noise stemming from video compression itself, so they can be discarded – I’d say they are within the margin of error. The values in the rest of the formula seem oddly close to being interpretable as fractions. For example the first part of the first equation is oddly close to
Could this be a coincidence? Maybe. It could be a helpful lead for figuring out what actually goes wrong though.
Using The Math In Practice
Wow that got overly mathematical very quickly. As someone who practically zones out when seeing an equation that contains a matrix it’s been interesting trying to remember the basics of this stuff. With that said, what can we do with this then?
Well, the main practical usage of having this equation is that we can actually apply it to real videos! Now, we did already have the script that converted it based on the hardcoded map but with this equation we can completely replace that with a single FFmpeg command:
ffmpeg -i "input.wmv" -vf "colorchannelmixer=rr=1.1905:rg=-0.1619:rb=-0.0335:gr=0.2409:gg=0.9949:gb=-0.2196:br=0.0524:bg=0.1106:bb=0.8571" "output.mp4"And it works! We can use this to restore real videos!

It’s Not So Simple
There’s a big catch with this approach… it’s not consistent. While it is clear that for every video I’ve tried with this method it does go in the right direction, there are videos where it “overshoots” it and the hue-shift effect just basically moves from something like +5 from the original colors to -5.

And this is kind of where I’m stumped. I’m not sure if this is just multiple discolorations stacking on top of each other or if there’s more to it. The fix also doesn’t reveal much about the root cause – while it appears to be an improper implementation of the BT.709 transformation matrix, how is it possible that the exact same mistake was made by Windows Movie Maker with their own implementation of their custom codec and various Android screen recorders. Keep in mind the results are mixed with pure screen recorded footage as well – for some of them the restoration is near-perfect.
Generalizing The Method
Knowing that these videos are possible to fix with a simple mathematical equation set I decided to see if this knowledge could be used for other videos where the exact formula I found doesn’t work. You may notice that every example I’ve posted so far is a screen recording. The reasoning between this selection is simple – screenshots tend to be RGB, which means that they are affected, but they also contain a lot of elements with known colors. In the case of Windows XP screenshots it’s easy to find the exact hex codes for the Luna theme, in Geometry Dash all object textures have known colors and in Club Penguin almost all assets are easy to find in their original form. This means that we can easily find many pixels where the exact hex codes of the non-distorted colors are known.
I’ve tried applying this knowledge to the Club Pengufu video mentioned above getting the following mathematical equation by cherry picking colors from various items shown at 1:40 onwards and comparing them to screenshots from the wiki. By doing this I’ve arrived at the following set of mathematical formulas:
By using NumPy to solve this I’ve arrived at the following matrix:
Vector a: [ 1.0942  0.1323  0.0159]
Vector b: [-0.0827  1.1904  0.2246]
Vector c: [-0.0145 -0.3221  0.877 ]
Compare this to the vectors we had with the original Movie Maker examples:
Vector a: [ 1.1905,  0.2409,  0.0524]
Vector b: [-0.1619,  0.9949,  0.1106]
Vector c: [-0.0335, -0.2196,  0.8571]
Red values (first column) are almost exactly double in the more generic one. Green and Blue are not as clear-cut, however they still match up with the subjective observation of the generic formula overshooting this particular video.
Either way this calculation gives me the following FFmpeg command to fix this specific video:
ffmpeg -i "input.wmv" -vf "colorchannelmixer=rr=1.0942:rg=-0.0827:rb=-0.0145:gr=0.1323:gg=1.1904:gb=-0.3221:br=0.0159:bg=0.2246:bb=0.8770" "output.mp4"And… it worked! It’s not 100% perfect, however the items part of the video now looks normal to my naked eye. It’s also possible that using more points than 4 would’ve given us a more accurate result, since there are also video encoding inaccuracies affecting this whole thing and I suspect anything that’s outside of the legal range is clipped in this specific recording. It also seems that this video might require restoration on a shot by shot basis, as the penguin color shown earlier in the video is still incorrect. However, it proves that the approach works.
The Root Cause?
The question remains: What is the root cause? And to that, I unfortunately have no answer. I’ve already mentioned my theory about this being caused by an incorrect RGB to YUV color-space transformation, however I don’t really have any answers beyond that. I would’ve liked to just blame this one on Microsoft’s engineers making a mistake in the formula and not noticing, however since unrelated pieces of software produce this exact same discoloration, there is almost certainly more to it. Maybe an unfinished draft of the BT.709 standard used a different transformation matrix? Hopefully someone who reads this (if anyone even gets this far at all) has more answers than I do.
As it stands, this is where I am. While I do have a method that reliably works for fixing any discolored video, I haven’t solved the issue itself. Hopefully someone else can chime in and answer the questions that I’m unable to.
One thought on “Chasing The Ancient Windows Movie Maker Hue Shift”
sakujes